If there’s one question we get asked more than almost any other at RCore, it’s this: “What grip angle should I be using on my bow?”
The honest answer? We can’t just give you a number. There are a hundred variables at play, from your physical anatomy and shoulder mechanics to the specific discipline you shoot. But while we can’t hand you a magic solution, we can give you the framework to find the perfect answer for yourself.
By looking at the underlying physics of bow balance and combining it with real-world, live-testing insights from Olympic medalist Jake Kaminski, we can break down exactly how different wrist heights alter your shot, your biomechanics, and your bow’s tuning.
To understand how grip angle changes your shot, you have to look past the surface comfort of your hand. When you draw and release, your bow is balancing on three critical, intersecting points:
When you change your grip angle, you change the vertical distance between the Pivot Point and the Pressure Point.
When you move to a higher, steeper grip angle, these two points converge, they get vertically closer together. When you flatten out to a lower angle, those points spread apart. That distance dictates your biomechanical leverage, your stability, and how much forgiveness you get at the release.
To give archers complete control, RCore offers all grip design profiles across a spectrum of four distinct angles. Here is how they stack up in design, feel, and performance during live testing:
| Grip Profile | Numeric Angle | Hand & Wrist Feel | Biomechanical Tradeoff |
|---|---|---|---|
| Compound-Like | Ultra-Low | Very flat hand position; noticeable wrist compression pressure. | Easiest to keep the bow shoulder down; alters draw length by several millimeters (requires moving clicker out). |
| Low | 30° | Standard low-wrist feel; minimal wrist pressure. | Highly stable; ideal for keeping the front shoulder locked naturally. |
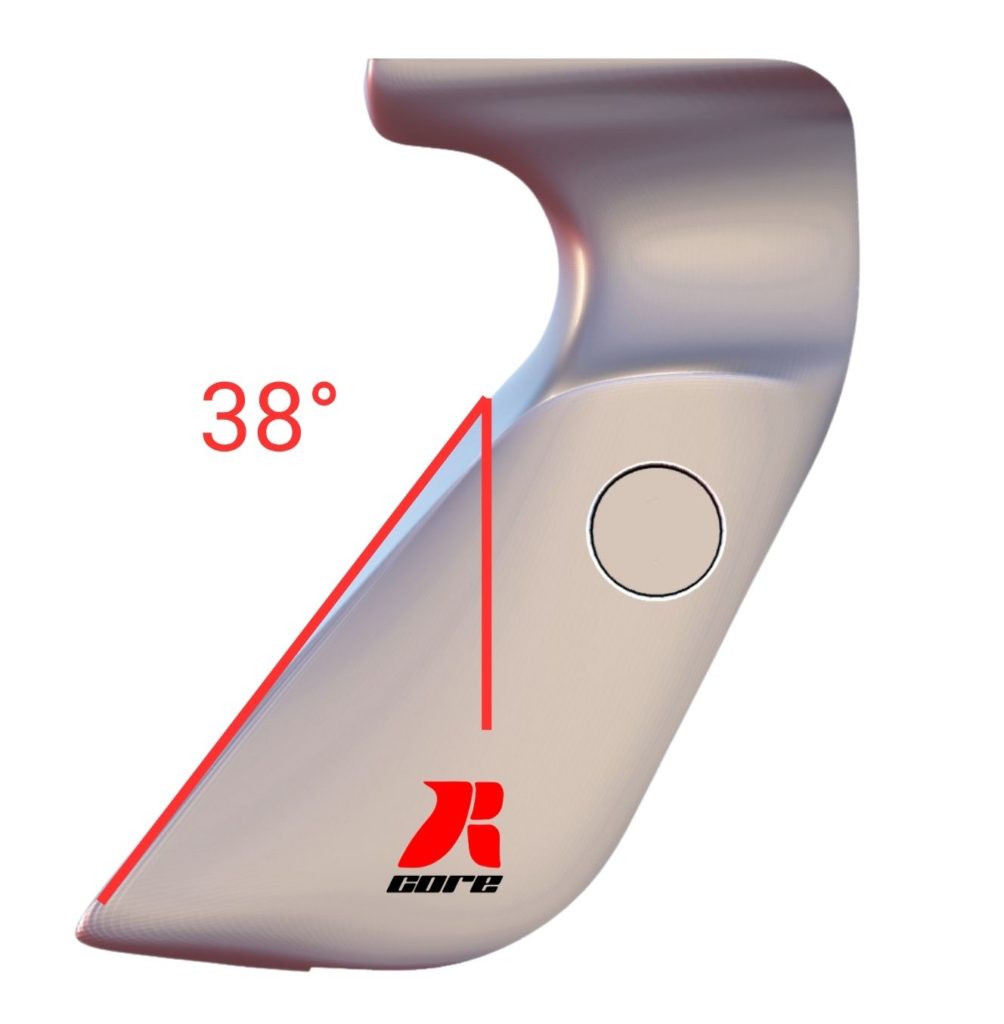
| Mid | 35°–38° | Balanced connection; solid contact in both the throat and palm heel. | The “sweet spot” for many; provides consistent alignment without overworking the arm. |
| High | 45° | Steep, vertical wrist; hand is pushed firmly up into the throat. | Maximizes draw length; requires substantial deltoid effort to prevent the bow shoulder from collapsing upward. |
A side-by-side testing highlights a massive mechanical tradeoff that every archer must balance: Vertical Forgiveness vs. Shoulder Fatigue.
A High (45°) grip pushes your pressure point right up against the pivot point. Because these two forces are tightly converged, it becomes incredibly difficult to accidentally exert torque or variance from shot to shot. If your hand pressure shifts slightly up or down between arrows, a high grip minimizes the vertical impact on the target. Furthermore, pushing your wrist forward flattens your skeletal structure, slightly extending your draw length and making your anchor exceptionally crisp.
If high grips are inherently more forgiving, why doesn’t everyone use a 45° angle? Because of your shoulder joint.
When you transition from a low grip to a high grip, the skeletal alignment changes. A low or compound-like grip makes it incredibly easy to keep your bow shoulder down, packed, and locked in place. As you move up to a high grip, it requires a bigger amount of active muscular effort in your deltoid to squeeze that shoulder down. If your shoulder starts rising, your draw length becomes highly variable, forcing you to fight your clicker or lose consistency entirely.
Because your grip angle radically changes how forces move through the bow, your choice should match the game you are playing.
If you shoot a fixed distance (like 18m indoor or 70m Olympic target), consistency is your highest priority. Because Olympic bows feature long stabilizers that push the Center of Gravity far forward, they pair beautifully with a Mid (35°–38°) or High (45°) grip. It locks in a repeatable draw length and prevents hand torque, provided your shoulder is strong enough to maintain a low, packed position throughout the tournament.
The moment you start string walking on a Field or 3D course, the physics completely invert. Crawling your fingers down the string to shoot short distances changes the direction of the draw force, heavily loading the lower limb and altering your tiller.
If you use a high grip with a deep crawl, the bow is pivoting on a literal knife-edge. The dynamic forces diverge heavily from the Center of Gravity, causing the bow to feel unstable, jump erratically, or want to instantly dip on release.
By choosing a Low 30° grip, you spread the pivot and pressure points apart. This gives your hand more physical leverage to muscle and manage the changing dynamic forces of the bow across a massive range of distances.
When choosing your next grip profile, use this quick checklist:
The beauty of the RCore philosophy is cross-riser and model consistency. Because we can manufacture the exact same ergonomic design in four entirely different angles (and anything in between), you can experiment cleanly. You can swap from a 30° to a 38° grip to test your shoulder alignment without changing any of the other parameters like the shape of the palm interface, material, antislip or even the riser you love. And when you get a new riser, your custom profile can follow you seamlessly.
Ready to find your optimal mechanical advantage? Explore our full lineup of customizable grip angles today.